
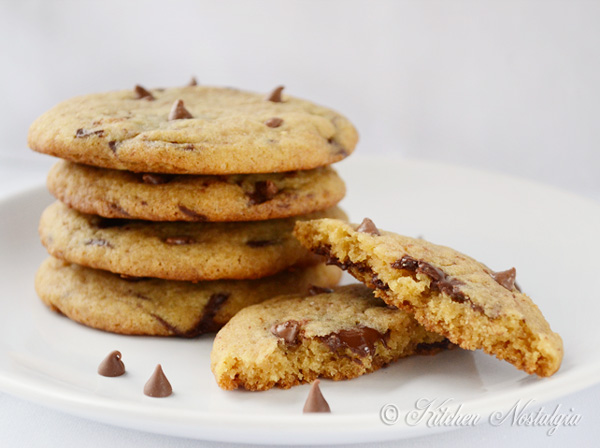
Everybody is in search of the best chocolate chip cookie recipe. So were editors of Cook’s Illustrated Cookbook until they developed a recipe that they considered perfect. They used browned butter, dark brown sugar and an extra egg yolk. I used this recipe as a starting point, experimented with it and in the end made some more changes to it.

Chocolate chip cookie seems like such a simple thing, yet there is whole science behind it. Let’s look closely.
FLOUR
The original recipe calls for all-purpose flour which has 8% to 11% protein (gluten). The high gluten flour makes a chewy cookie, while less protein makes tender cookies.
I substituted half of the all-purpose flour with cake flour (which is higher in starch, and lower in protein, about 8% to 10%) because it gives cookies softer texture and cookies will be less liable to collapse. You can make your own cake flour at home by placing 2 Tablespoons of cornstarch in a one-cup measure and filling the rest of the cup with all-purpose flour; level top. Now you’ve got 1 cup cake flour. Sift the flour to distribute the corn starch well before using it.
If you prefer crumbly texture, you can use pastry flour (with protein/gluten of 9% to 10%).
BAKING SODA
I used baking powder together with baking soda to make cookies softer and to help them rise and spread evenly. Baking powder is responsible for lift, while baking soda helps to prevent cookies to turn out humped.
Baking soda is good when you use acid in the recipe, provided by ingredients such as yogurt, buttermilk or sour cream.
Baking powder consists of baking soda already mixed with a dry acid, like cream of tartar. It is better to use baking powder when there is no natural acidity in the batter.
BUTTER
Majority of cookie recipes begin by creaming softened butter with sugar to ensure that the ingredients are aerated. These air bubbles expand when baked and give a cookie its lift.
Completely melted butter makes dough spread during baking. The cookies will be flat and thin. Creaming butter and sugar until it is light increases its spread, while blending butter and sugar reduces its spread.
In this recipe half of the butter is melted instead of creamed to increase chewiness. The other half is added to melted butter to cool down the melted butter a bit. One extra step can be made by browning the melted butter for nutty flavor.
The cookies from Cook’s Illustrated Cookbook were way too greasy for me, so I used smaller amount of the butter they suggested.
See the difference between melted butter and browned butter:


SUGAR
Brown sugar enhances chewiness and moistness, while white sugar lends crispness. If you use all brown sugar cookies will be floppy. The original recipe suggests using dark brown sugar for rich butterscotch flavor.
For readers from Europe and other parts of the world where it is not easy to find moist dark brown sugar: you can use ¾ amount of dry light brown sugar and ¼ of dark Muscovado sugar (that is what I did). If the granules are too big, they can be ground in coffee grinder (spice grinder).
If you want your cookies to have cracked surface and deeper flavor, you can wait for 10 minutes after you stir together the butter, sugar, and eggs. In this way sugar will dissolve in the liquids and it will caramelize more during baking. I was not after that, so I omitted this step.
Since I used honey, I decreased the quantity of sugar in the recipe. I am not fond of too sweet cookies, but if you have a sweet tooth you can add ¼ cup of sugar more.
SALT
Salt brings out flavors and balances the sweetness in a recipe. I don’t like too much salt in the cookies so I halved the amount suggested. Feel free to use 1 teaspoon of salt, if you like it.
EGGS
Instead of 2 whole eggs, we use 1 large egg plus 1 large yolk for increased chewiness because egg whites tend to make cookies dry and cakey, while egg yolks give a smooth texture.
HONEY
If you want your cookies to remain moist and chewy for as long as possible, you should add honey, corn syrup or molasses to the dough. These ingredients contain fructose sugar which attracts moisture from the air. Without it, the cookies become firm and dry just a few hours after baking. I used about 1 tsp in this recipe.
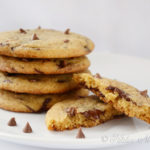
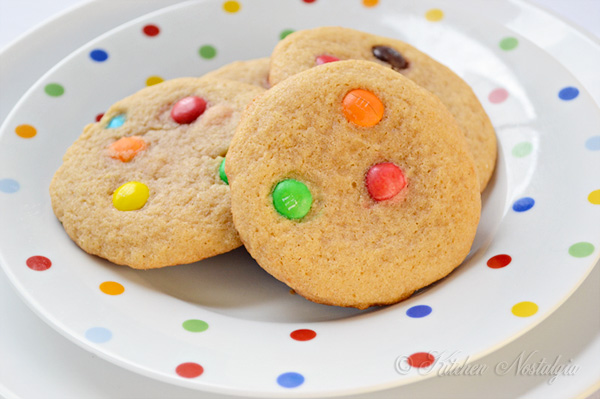
CHOCOLATE CHIPS
Use any kind you like – bittersweet, semi-sweet or milk chocolate chunks or chocolate chips. You can even use several kinds at once.
NUTS
This step is totally optional. You can add ¾ cup (80g) of toasted and chopped pecans or walnuts into the cookie dough. I decided not to use them this time.
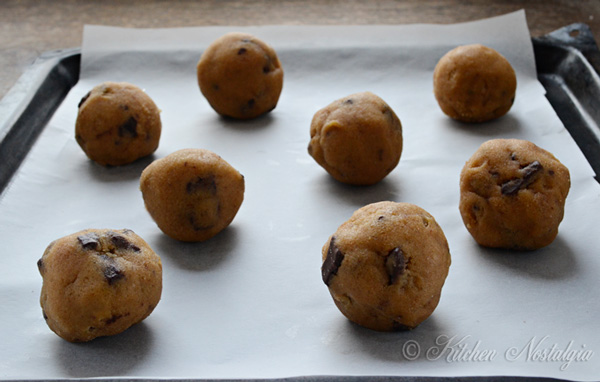
SHAPING
For smooth and evenly shaped cookies, roll the dough with your hands. Take 2 tablespoons of dough at a time, and roll it into balls. If you use spoon or ice cream scoop to drop the cookie dough onto the baking sheet, cookies will be jagged and unevenly shaped.
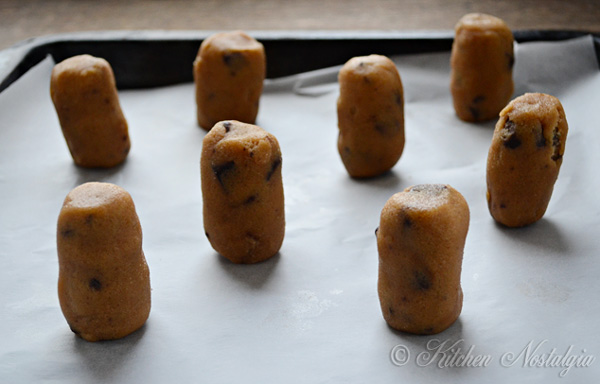
Another way of shaping cookies is to form the dough into a log (or 2 logs) before chilling. When you are ready to bake, cut the log into 16 cylinders and place them vertically on a baking tray.
I tried shaping cookies into balls as well as into cylinders. After baking they both turned out the same, so it doesn’t really matter.
CHILLING
Chilling the dough helps cookies keep their shape. Also, if you bake dough immediately after mixing, without chilling, it will spread.
HEAT
Too much heat can rob food of moisture, leaving it rubbery and dry. We want our cookies to remain moist so we use gentle heat to prevent overbaking. We should pull them out of the oven when they’re still moist in the middle and let them cool on the baking sheets. They will continue to bake on the hot sheet for a minute or two after they’re out.
Since I have an old gas oven, I cannot rely on baking time. I judge by the look of the cookies: I bake them until cookies are puffy and edges have begun to brown but centers are still soft. In this case, it is better to underbake them a little if you want them to remain soft and moist.

I am a visual person, so it is always easier for me to understand instructions with more images and less text. That is why I made the following infographics:
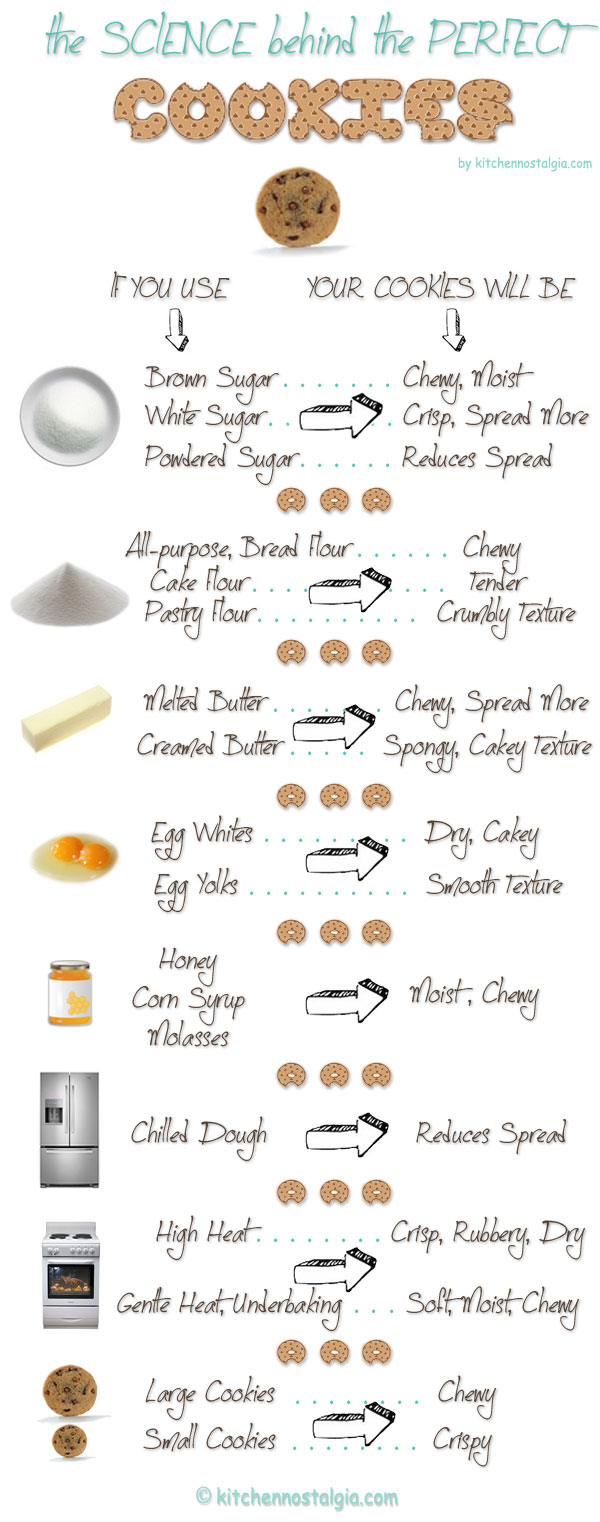
So, now, when you know all the tricks, run to your kitchen and start baking!
P.S. If you like this „scientific“ approach, let me know so that I can plan my future research. And stay connected!
Now you can see how I make Best Ever Chocolate Chip Cookies. Just click the “Play” button to watch the video:
- 1 ½ cup (125 g) all-purpose flour
- ¾ cup (95 g) cake flour*
- ½ teaspoon baking powder
- ½ teaspoon baking soda
- 3/4 cup (6 oz; 170g) unsalted butter
- 1 tsp honey or corn syrup or molasses
- ½ cup (3 1/2 ounces; 100g) packed fresh and moist brown sugar dark or light
- ¼ cup (2 ounces; 50g) white granulated sugar
- ½ teaspoon salt
- 2 teaspoons vanilla extract
- 1 large egg plus 1 large egg yolk
- 1 ¼ cups (7½ ounces; 200g) semisweet chocolate chips or chunks
-
Preheat oven to 350 degrees (175 C). Line 2 baking sheets with baking paper (parchment paper). Do not grease the paper or cookies will spread.
-
In a medium bowl, combine all-purpose flour, cake flour, baking powder and baking soda and set aside.
-
In a thick-bottomed skillet, melt half of the butter over medium heat. Continue cooking, whisking frequently, for about - 1 to 3 minutes or until butter is lightly browned and has nutty aroma. Be careful not to burn the butter. Transfer to a large bowl and add remaining unmelted butter. Stir until combined. (If your butter melts completely, put it in the freezer for a few minutes until it has consistency of a firm yogurt or cream).
-
Add honey, brown sugar, white sugar, salt and vanilla. Whisk (with a hand whisk, no mixer needed) until incorporated. Add egg and yolk and continue whisking until mixture is smooth. If you want your cookies to have cracked surface, let the mixture stand for 10 minutes at this point.
-
Using wooden spoon or rubber spatula, stir in flour mixture until just combined. Do not overmix. Stir in chocolate chips.
-
Take 1 tablespoon of dough (or 2 tablespoons for extra large, 4 inch / 10 cm diameter cookies) at a time and roll into balls. Place 2 inches apart on lined baking sheets. You can add more chocolate chips on top of each cookie to make them look pretty (optional). To prevent cookies from spreading too much, you can chill them at this point (optional).
-
Bake 1 sheet at a time on the middle rack, until cookies are puffy and slightly brown, about 10 to 12 minutes (depending on your oven). Cookie centers should still be soft. Rotate baking sheet halfway through baking. Cool the cookies on the sheets.
Recipe Video
* If you don't have cake flour at hand, you can substitute it with homemade cake flour. Add 2 tablespoons of cornstarch to a 1 cup measure. Fill up the rest with the all-purpose flour. This is your cake flour. You will need ¾ cup of this mixture for this recipe.


Best ever blog for the best ever chocolate chip cookie. What I really liked about it is that it has specific information as to what to do step by step. It even has an illustrated guide for easy understanding.
Thank you. I really tried very hard to create this post. You know: baking, taking photos, editing, food science research, drawing infographics… I am glad someone appreciates it.
I adore your scientific approach, came across it on Pinterest. I would love to read more about how to make muffins so that they don’t dome and crack. I know you are supposed to mix until just incorporated but I can’t work out quite how much that is. I also find using melted butter in muffins just a bit too fattening so switch it for greek yoghurt. I like the result better but wonder about the science of it. I do this swap for lemon poppy seed muffins which I then glaze so a lot of the sweetness is provided… Read more »
I am glad you like what I did. I will do my best to find answers to your questions about muffins.
Excellent recipe for different versions of chocolate chip cookies – your recommendations are right on. Thank you for the chart – it’s a wonderful guide.
Note to other Readers:PLEASE comment here just on the cookies and if you need muffin baking advice (or other), its fairly easy to contact the blog author via another method – – this is supposed to be ALL ABOUT CHOC CHIP COOKIES here!
Thanks, April!
I really appreciate the info. I am always working to perfect my cookies and want to understand the “science” behind why it works/doesn’t work.
Love this! I’ve never seen such a readable yet comprehensive guide to cookies! Keep up the good work :).
Thank you! I’m glad I could help 🙂